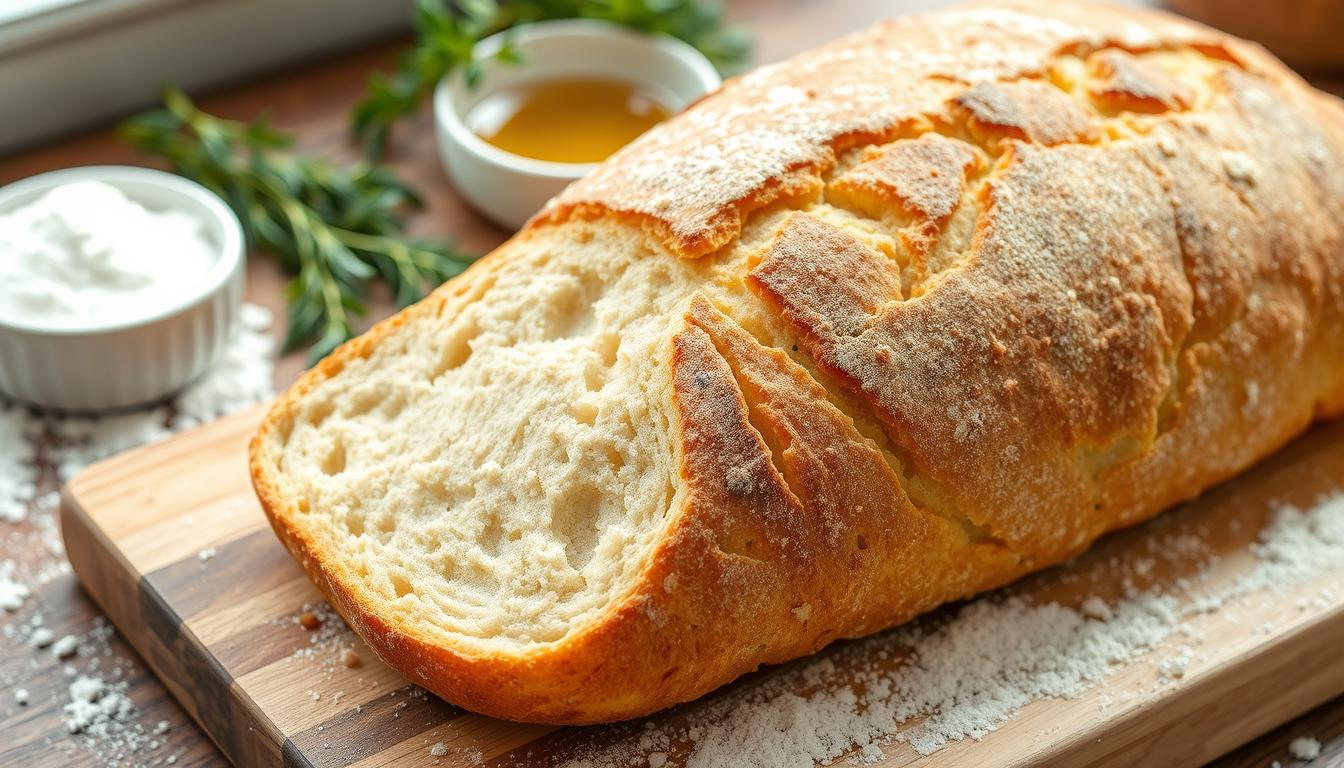
Imagine waking up to the amazing smell of freshly baked bread in your kitchen. It’s all done with almost no effort from you. This overnight bread recipe makes your home smell like a real bakery, showing that great bread is easy to make.
This no-knead bread recipe is incredibly simple. You just need four basic ingredients and 90 seconds of prep time. The result? A loaf that’s as good as what you’d buy from a bakery. The secret? Letting time do the work while you sleep.
Starting your homemade artisan bread journey is easy. It requires just a few ingredients and lots of flavor. This easy bread recipe changes how you see baking. It turns a complex process into a simple and fun adventure.
Key Takeaways for this Overnight Bread Recipe
- Requires only 90 seconds of preparation time
- Uses just 4 simple ingredients
- Develops deep flavor through slow fermentation
- Produces bakery-quality bread at home
- Completely hands-off overnight method
- Suitable for bakers of all skill levels
The Magic of this No-Knead Overnight Bread Recipe
Discover the magic of no-knead bread, a simple way to make amazing artisan bread. It’s loved by over 5,000 families across the country. This method turns basic ingredients into something special with little effort.
Why Time Does the Work for You in our Overnight Bread Recipe
The secret to perfect no-knead bread is its slow fermentation. You don’t need to knead the dough. Instead, let time do the work. Your bread will develop over 12-24 hours, getting rich flavors and a great texture.
- Minimal hands-on time required
- No complicated kneading techniques
- Develops rich, deep flavor naturally
Benefits of Slow Fermentation
Slow fermentation changes the game in bread making. It lets the dough rest and develop over time. This creates a bread with:
- Enhanced flavor profile
- Improved digestibility
- Better texture and crumb structure
“Time is the secret ingredient that transforms simple ingredients into an extraordinary loaf.” – Artisan Bread Experts
What Makes This Overnight Bread Recipe Special
Your no-knead bread recipe is special because it uses just four ingredients: flour, yeast, salt, and water. It’s simple and forgiving. Whether you’re new to baking or experienced, this method always produces a great loaf.
| Ingredient | Quantity |
|---|---|
| All-Purpose Flour | 3 cups |
| Instant Yeast | 1/2 teaspoon |
| Kosher Salt | 1 3/4 teaspoon |
| Cool Water | 1 1/2 cups |
Essential Ingredients for the Perfect Overnight Bread Recipe
Making a great artisan bread begins with the right ingredients. The secret to a perfect loaf is using high-quality ingredients that blend well together.
Your bread’s success comes from four key ingredients. They turn simple parts into a tasty masterpiece:
- Flour for bread: All-purpose or bread flour is the base of your loaf
- Active dry yeast: The key to making it rise
- Kosher salt: It adds flavor and controls how it rises
- Warm water: It brings everything together and makes the dough strong
Here are the exact amounts you need for your artisan bread:
| Ingredient | Quantity | Purpose |
|---|---|---|
| All-Purpose Flour | 3 1/4 cups (425 grams) | Provides structure and volume |
| Kosher Salt | 1 1/2 teaspoons | Flavor enhancement |
| Active Dry Yeast | 1/2 teaspoon | Fermentation and rising |
| Warm Water | 1 1/2 cups | Hydration and gluten development |
“The secret to great bread is not just ingredients, but understanding how they interact.” – Professional Baker
Pro tip: Try adding up to 1/2 cup of whole wheat flour. It adds a nutty taste and more nutrients to your bread.
The Science Behind Overnight Bread Recipe
Bread making is a mix of chemistry and art. The overnight bread recipe turns simple ingredients into a complex, tasty loaf. This happens through amazing scientific processes.
Gluten Development Process
Gluten development is a magical change that happens during long fermentation. When flour meets water, proteins start to bond. This creates a strong yet flexible structure in the bread.
- Proteins in flour start connecting during extended resting periods
- Water activates enzymes that help break down complex flour structures
- Slow fermentation allows for deeper gluten network formation
Role of Yeast and Fermentation
Yeast is the hidden power behind bread making. These tiny creatures eat sugars in the flour, making carbon dioxide. This creates the air pockets in your bread. Fermentation is not just about rising. It’s also about making deep, complex flavors.
“Fermentation is the soul of bread making, transforming simple ingredients into a living, breathing culinary experience.”
Temperature and Environment Factors
Your kitchen’s environment is key in bread fermentation. Temperature affects yeast activity and gluten development. Cooler temperatures slow down fermentation, letting flavors develop more. Warmer environments speed up the process.
The science behind overnight bread is a balance of time, temperature, and ingredient interaction. By understanding these, you can make artisan-quality bread at home.
Required Equipment and Tools
To make artisan bread at home, you need a few important tools. These tools will turn your kitchen into a real bakery. The right gear can greatly improve your bread-making skills.
Essential Baking Equipment
- Large mixing bowl for preparing dough
- Wooden spoon or flexible spatula
- Precise measuring cups and spoons
- Dutch oven for bread baking
- Parchment paper for easy bread transfer
- Bench scraper for handling sticky dough
Your Dutch oven is key for bread baking. This versatile cooking vessel creates the perfect baking environment. It traps steam, helping to make a crispy, golden crust like a professional bakery.
Recommended Baking Tools
Choose a quality enamel-coated Dutch oven or a heavy cast-iron pot with a tight lid. Parchment paper is your secret for preventing sticking and easy dough transfer.
“The right tools can turn simple ingredients into extraordinary bread.” – Artisan Baker’s Wisdom
Look for durable, heat-resistant baking tools. A good Dutch oven and parchment paper will make your bread taste like it’s from a bakery.
Step-by-Step Mixing Process
Making the perfect no-knead bread is all about mastering the mixing art. It might look hard, but with the right steps, you can make a beautiful loaf easily.
Proper Ingredient Measurements
Getting the measurements right is crucial in bread making. For the best results, use a kitchen scale. Here’s what you’ll need:
- 700g all-purpose flour
- 455g room temperature water
- 1/2 teaspoon active dry yeast
- 1 1/2 – 2 teaspoons kosher salt
Mixing Techniques
When mixing, be gentle. Start by whisking the dry ingredients in a big bowl. Make a well in the middle and add warm water. Use a wooden spoon to mix until you get a shaggy, sticky dough.
“The magic of no-knead bread is letting time do the work for you.”
Initial Dough Consistency
| Dough Characteristic | Description |
|---|---|
| Hydration Level | 65% (65g water per 100g flour) |
| Texture | Wet and loose, unlike regular dough |
| Mixing Intensity | Minimal – just a quick mix is needed |
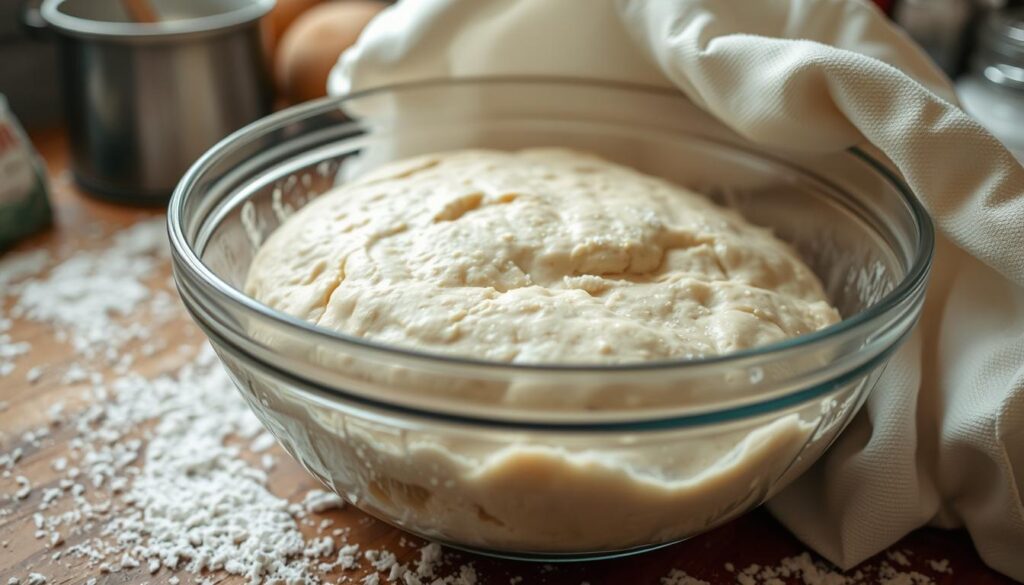
The aim is to mix the dough with a light touch. Your dough will look messy, but that’s okay! Cover it with plastic wrap and let it rest overnight.
Overnight Resting: The Key to Success
Bread fermentation is a magical process that turns simple ingredients into an amazing loaf. The overnight bread rise is your secret to making restaurant-quality bread at home. During this time, your dough changes in ways that make it taste deep and feel incredible.
“Time is the most important ingredient in artisan bread making” – Professional Baker’s Wisdom
Your dough needs patience to reach its best. The slow fermentation breaks down starches, making the bread easier to digest and more flavorful.
- Ideal resting temperature: 68-72°F (room temperature)
- Recommended resting duration: 12-18 hours
- Key signs of proper fermentation: Bubbling surface, slight increase in volume
The longer your dough rests, the more complex its flavor gets. Bread fermentation is not just waiting—it’s flavor development in progress.
| Resting Time | Flavor Intensity | Texture Development |
|---|---|---|
| 8 hours | Mild | Basic structure |
| 12 hours | Moderate | Good gluten development |
| 18 hours | Complex, tangy | Excellent open crumb |
Professional bakers say an overnight bread rise is not just easy—it’s a technique that makes your bread amazing. Your patience during this time will be rewarded with a loaf full of flavor and perfectly structured.
Shaping Your Overnight Bread Recipe
Making the perfect artisan bread is all about shaping the dough right. This step turns your fermented mix into a stunning loaf. It looks and feels like it was made by a pro.
Working with wet dough can be tough for beginners. The trick is to know how to handle a sticky, high-hydration mix without messing up its structure.
Mastering Wet Dough Techniques
Here are some key tips for shaping your dough:
- Use a generously floured surface to prevent sticking
- Keep hands lightly coated with flour
- Handle the dough gently to maintain air bubbles
- Work quickly to prevent excessive manipulation
Creating Perfect Surface Tension
Getting the surface tension right is key for a beautiful bread shape. You need to fold and tuck the dough’s edges carefully. This makes the outside smooth and tight.
“Gentle touches create extraordinary bread” – Artisan Baker’s Wisdom
Professional bakers suggest using a bench scraper for wet dough. It helps manage the dough without overworking it. The aim is to get a smooth, tight surface. This supports the dough’s rise and helps create a beautiful crust.
Shaping bread dough takes practice. Don’t worry if your first loaves aren’t perfect. Every loaf is a chance to learn and improve.
Dutch Oven Baking Method
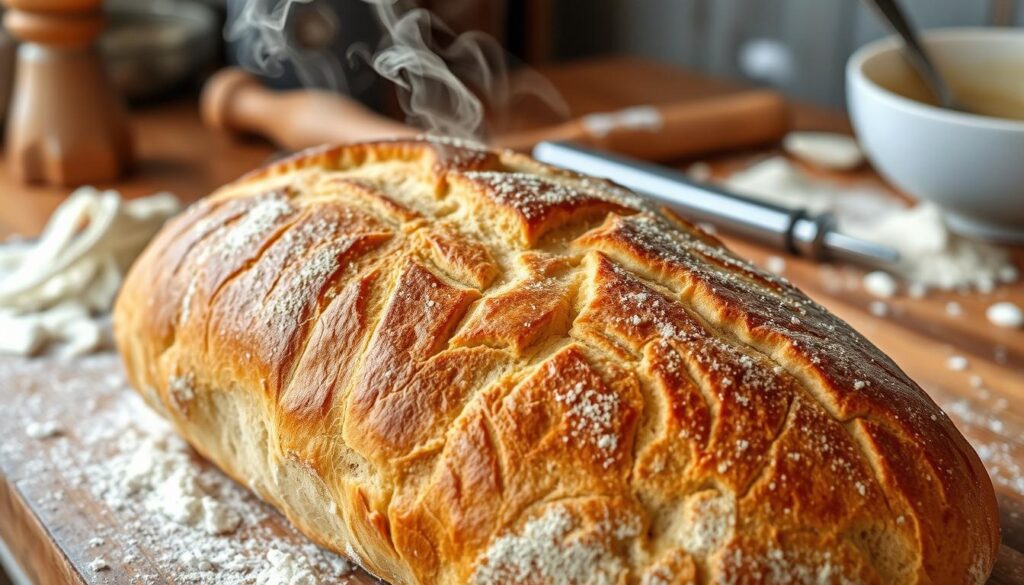
Learning to bake this overnight bread recipe turns your kitchen into a real bakery. It makes a crust that’s crispy and golden, and the inside is soft and airy. This is what professional bakers aim for.
- Preheat your Dutch oven to 450°F (230°C) for 30-45 minutes
- Use parchment paper for easy dough transfer
- Create steam by keeping the lid on during initial baking
The secret to great bread baking is knowing about heat. A Dutch oven works like a mini oven with steam. It traps moisture, making a perfect baking spot.
“The Dutch oven is the home baker’s secret weapon for professional-quality bread.”
Here are some key tips for baking perfect Dutch oven bread:
- Bake covered for 20-25 minutes
- Uncover and continue baking 15-20 minutes
- Aim for an internal bread temperature of 206-208°F
Pro tip: Sprinkle cornmeal or wheat bran in the bottom of your Dutch oven to prevent burning and add extra texture to your crust.
Your hard work in keeping the temperature and technique right will pay off. You’ll get a loaf that’s as good as any from an artisan bakery.
Creating the Perfect Crust in this Overnight Bread Recipe
Making a great bread crust is like a work of art. It turns your overnight bread recipe into something truly special. The secret is knowing how heat and steam combine to make that crispy, golden outside.
The perfect crust comes from baking at high temperatures and managing steam well. Your Dutch oven is key here. It keeps moisture in, helping the crust develop perfectly.
- Initial baking creates steam that helps develop a crisp bread crust
- High temperatures (450ºF) are key to achieving a golden-brown exterior
- Removing the lid allows the crust to crisp and brown beautifully
“The magic of a great bread crust is in the delicate balance between moisture and heat.” – Artisan Bread Masters
To get that perfect artisan bread texture, watch these key moments:
- Preheat your Dutch oven to ensure maximum heat retention
- Cover the pot for the first 30 minutes to trap steam
- Uncover for the final 15 minutes to crisp the crust
Pro tip: Let your bread cool for at least 20 minutes after baking. This resting period allows moisture to settle, ensuring a crisp bread crust that’s neither too hard nor too soft.
| Baking Stage | Temperature | Duration |
|---|---|---|
| Initial Baking | 450ºF | 30 minutes (covered) |
| Final Crisping | 425ºF | 15 minutes (uncovered) |
Creating the perfect bread crust takes patience and precision. Each loaf is a unique journey that rewards you with a crispy, golden outside and a soft, airy inside.
Tips for Achieving Bakery-Style Results
Mastering artisan bread baking tips requires precision and understanding of key techniques. Professional bakers know that creating the perfect loaf goes beyond simple ingredient mixing. Your homemade bread techniques can transform an ordinary recipe into an extraordinary culinary experience.
Crafting bakery-quality bread at home demands attention to several critical factors:
Temperature Control Strategies
- Maintain consistent oven temperature between 450-475°F
- Use an instant-read thermometer to check bread doneness (200°F-205°F)
- Ensure dough rises in a warm environment (75-78°F)
Steam Management Techniques
Steam plays a crucial role in developing a crisp, golden crust. Your overnight bread recipe can benefit from these methods:
- Preheat Dutch oven with lid for maximum steam retention
- Add ice cubes to bottom of oven for additional moisture
- Spray water inside oven before placing bread
Critical Timing Guidelines
| Stage | Recommended Time |
|---|---|
| Initial Rise | 12-18 hours |
| Final Proof | 1-2 hours |
| Baking | 30-45 minutes |
| Cooling | 1 hour minimum |
“Patience transforms good bread into great bread.” – Artisan Baker’s Secret
Remember, artisan bread baking tips are about understanding your ingredients and respecting the process. Each loaf tells a story of temperature, time, and technique.
Storage and Serving Suggestions
After making your perfect overnight bread recipe, it’s important to know how to store and serve it. Storing homemade bread right helps keep its texture and flavor great.
Room temperature is best for storing homemade bread. Here are some tips:
- Cool the bread completely before storing
- Use a bread box or paper bag for optimal freshness
- Keep bread at room temperature for up to 3 days
- Avoid refrigerating, as it accelerates staling
Freezing is great for longer storage. Slice your bread before freezing to make thawing easier. Wrap slices in plastic wrap or freezer bags. Frozen bread stays good for up to 3 months.
“Fresh bread is best enjoyed within the first few days of baking” – Artisan Bread Makers
Serving artisan bread opens up many culinary options:
- Pair with soups and stews
- Create gourmet sandwiches
- Serve alongside cheese boards
- Toast and top with spreads such as a peach jelly
- Use for bruschetta or crostini
Pro tip: Reheat frozen bread slices in a toaster or oven to get that fresh-baked crispness. Your homemade bread deserves to be enjoyed at its best!
Conclusion
Making easy bread at home is easier than you think. This overnight bread recipe turns simple ingredients into amazing homemade bread. It’s just as good as what you find in bakeries.
This recipe is simple and flexible. You can use whole wheat, medium protein bread flour, or mix them. The 74% hydration makes the dough easy to shape. It lets you try different flours and flavors.
Getting better at bread-making takes practice. Each loaf teaches you something new. Your Dutch oven helps make the crust crispy and the inside soft.
Begin your bread-making adventure today. You’ll love making something delicious from scratch. Your kitchen will fill with the amazing smell of fresh bread.
FAQ
How long does the dough need to rest for this overnight bread recipe?
Let the dough rest for 12-18 hours at room temperature. This long time is key for flavor and texture. Longer times, up to 18 hours, make the bread even better. They help gluten develop and add depth to the flavor.
Can I use a different type of flour for this overnight bread recipe?
You can swap up to 1/2 cup of whole wheat flour for all-purpose without changing the dough’s moisture. The recipe is flexible. Using bread flour or a mix of all-purpose and bread flour can improve the bread’s structure and texture.
What if I don’t have a Dutch oven?
A Dutch oven is great for steam and a crispy crust. But, you can use an oven-safe pot with a lid if you don’t have one. If all else fails, place a metal baking pan with water on the bottom rack to create steam.
How do I know when this overnight bread recipe is fully baked?
The bread is ready when it’s golden-brown and sounds hollow when tapped. Bake covered at 450°F for 30 minutes, then without the lid for 10-15 minutes more. This will make the crust deep golden brown.
How should I store this overnight bread recipe?
Keep the bread in a paper bag or bread box at room temperature for up to 3 days. For longer storage, slice and freeze the bread for up to 3 months. Reheat frozen slices in a toaster or warm oven.
Why is my dough so sticky?
Sticky dough is normal with this no-knead method. The high moisture helps gluten develop, making the bread airy. Use plenty of flour when handling the dough and avoid overworking it. A bench scraper and well-floured hands can help manage the sticky texture.
Can I add other ingredients to this overnight bread recipe?
Absolutely! You can add herbs, cheese, olives, or other mix-ins before the first rest. Just be careful not to add too much wet stuff that might mess with the dough’s moisture.
Do I need to use instant yeast?
Active dry yeast works perfectly for this recipe. Make sure your yeast is fresh and hasn’t expired. Use the full amount called for in the recipe for proper rising and flavor.


